Connect Visma e-conomic account
How to Install the App
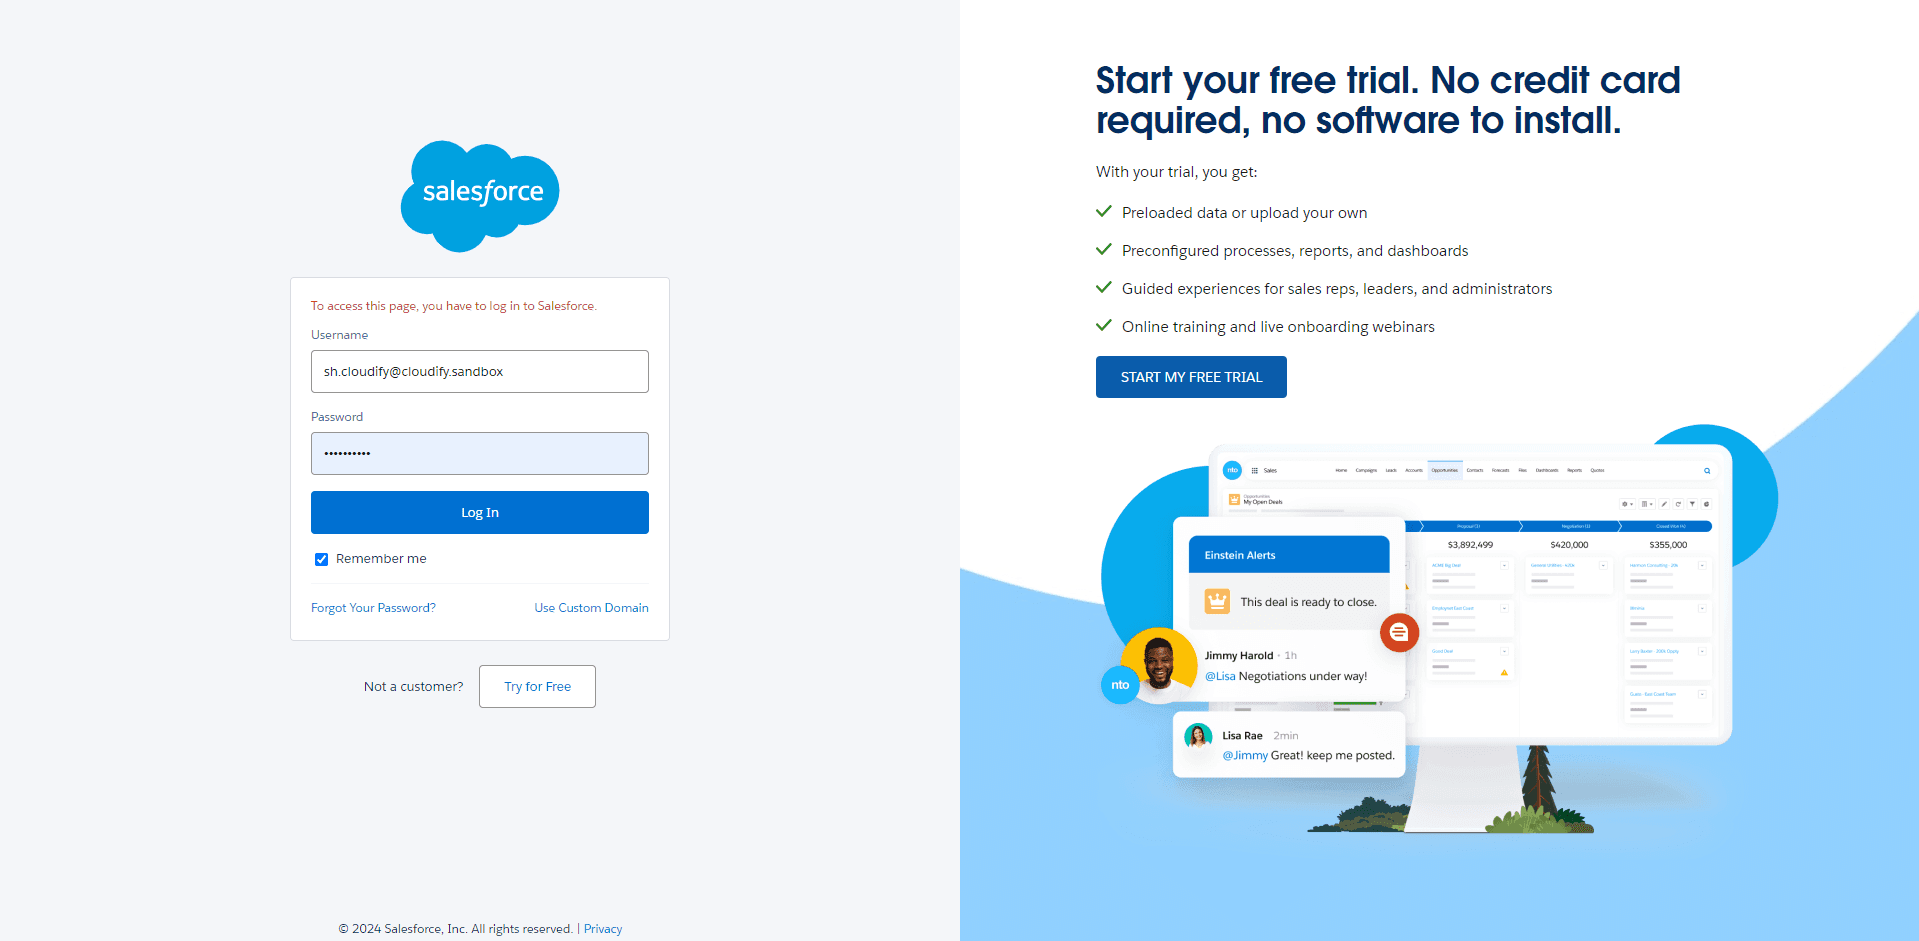
Visit this official Salesforce login link. Input your username and password and click "Login".
ii) Find the Visma e-conomic application in the Salesforce Marketplace and click "Install".
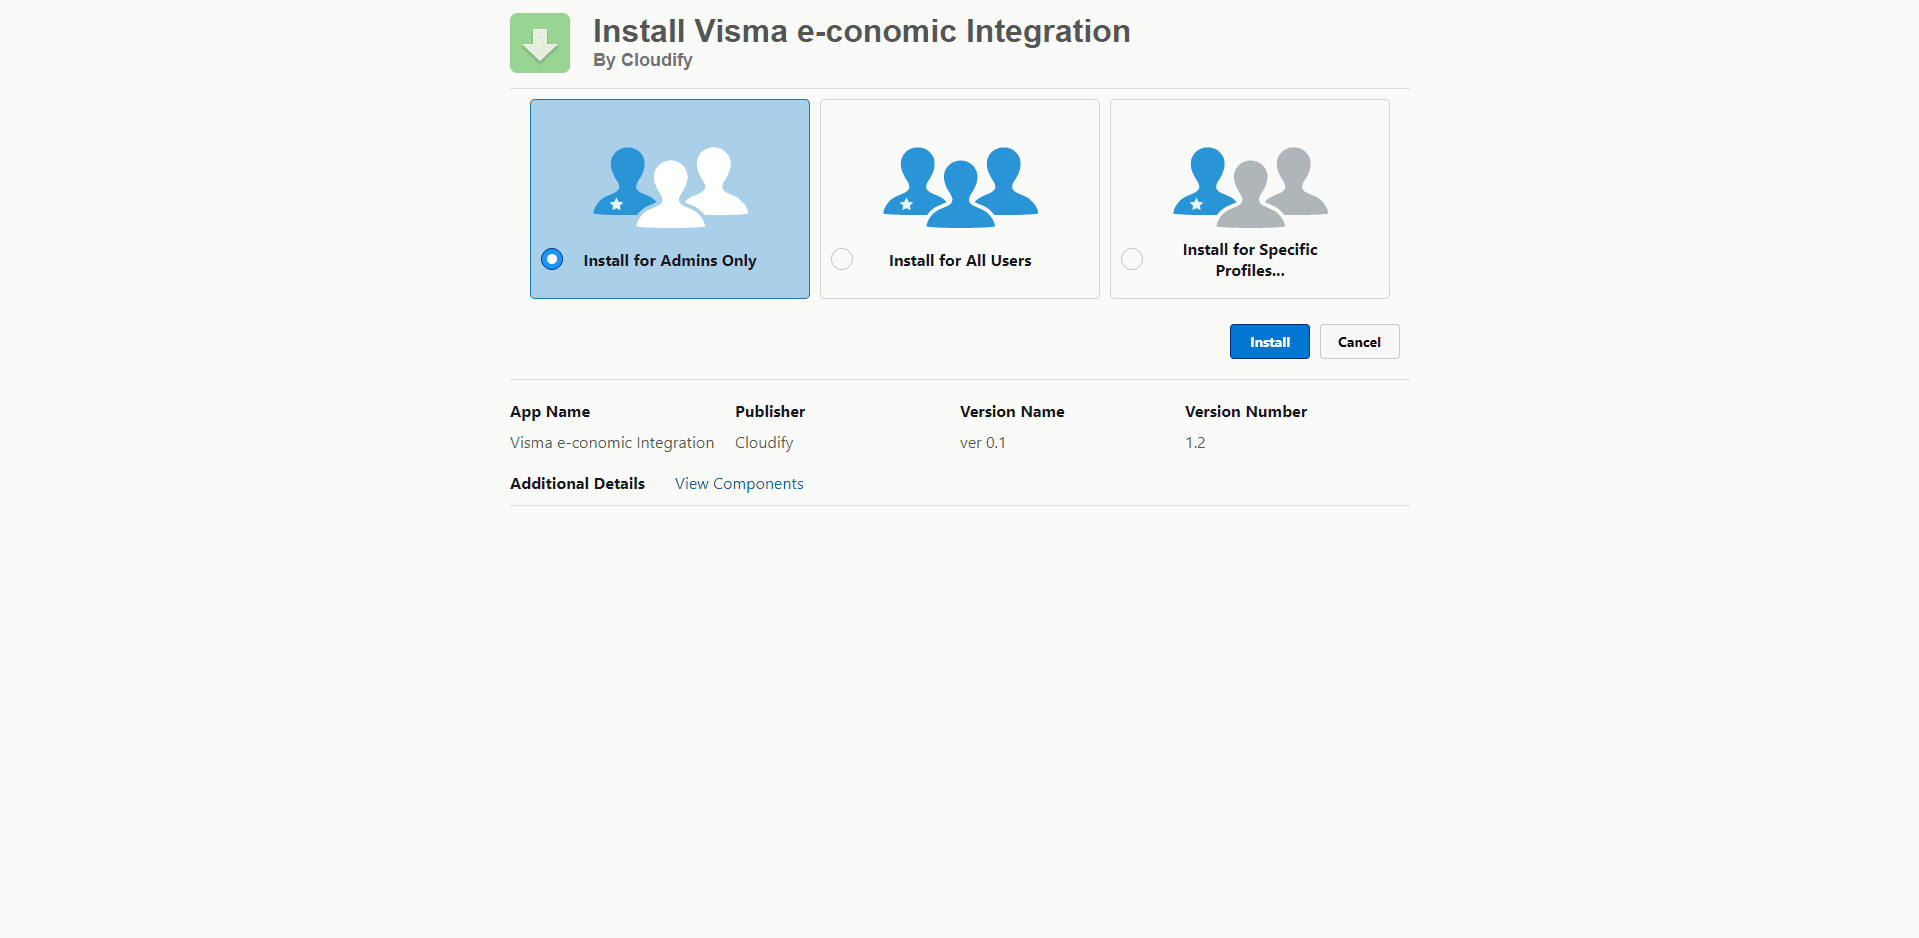
iii) You will be shown three options. Select one of them and click "Install".
a) Install for Admins Only: This option restricts the app usage to system administrators only.
b) Install for All Users: This option makes the app available to all users in your system.
c) Install for Specific Profiles: This option allows you to select specific user profiles for which the app will be available.
iv) A dialogue box will appear. In it, you must check the “Yes, grant access to these third-party websites” option and then click "Continue".

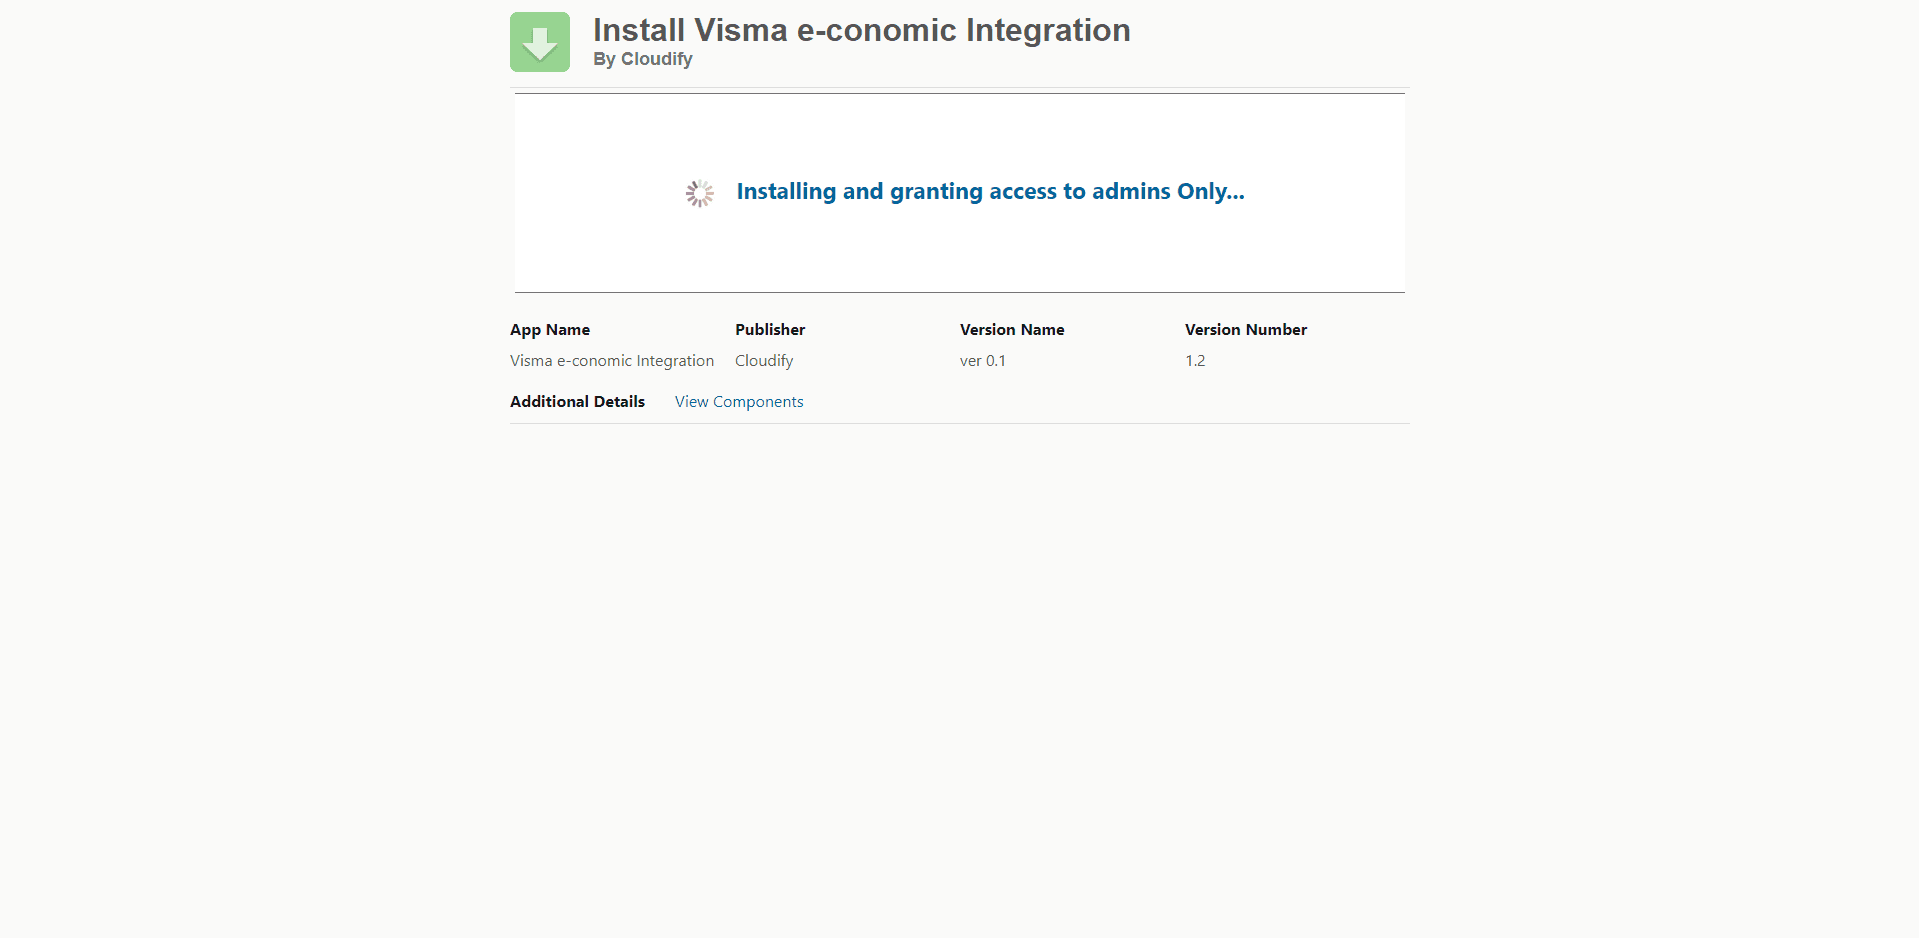
v) You will view a loading screen. Please wait for a few seconds here.
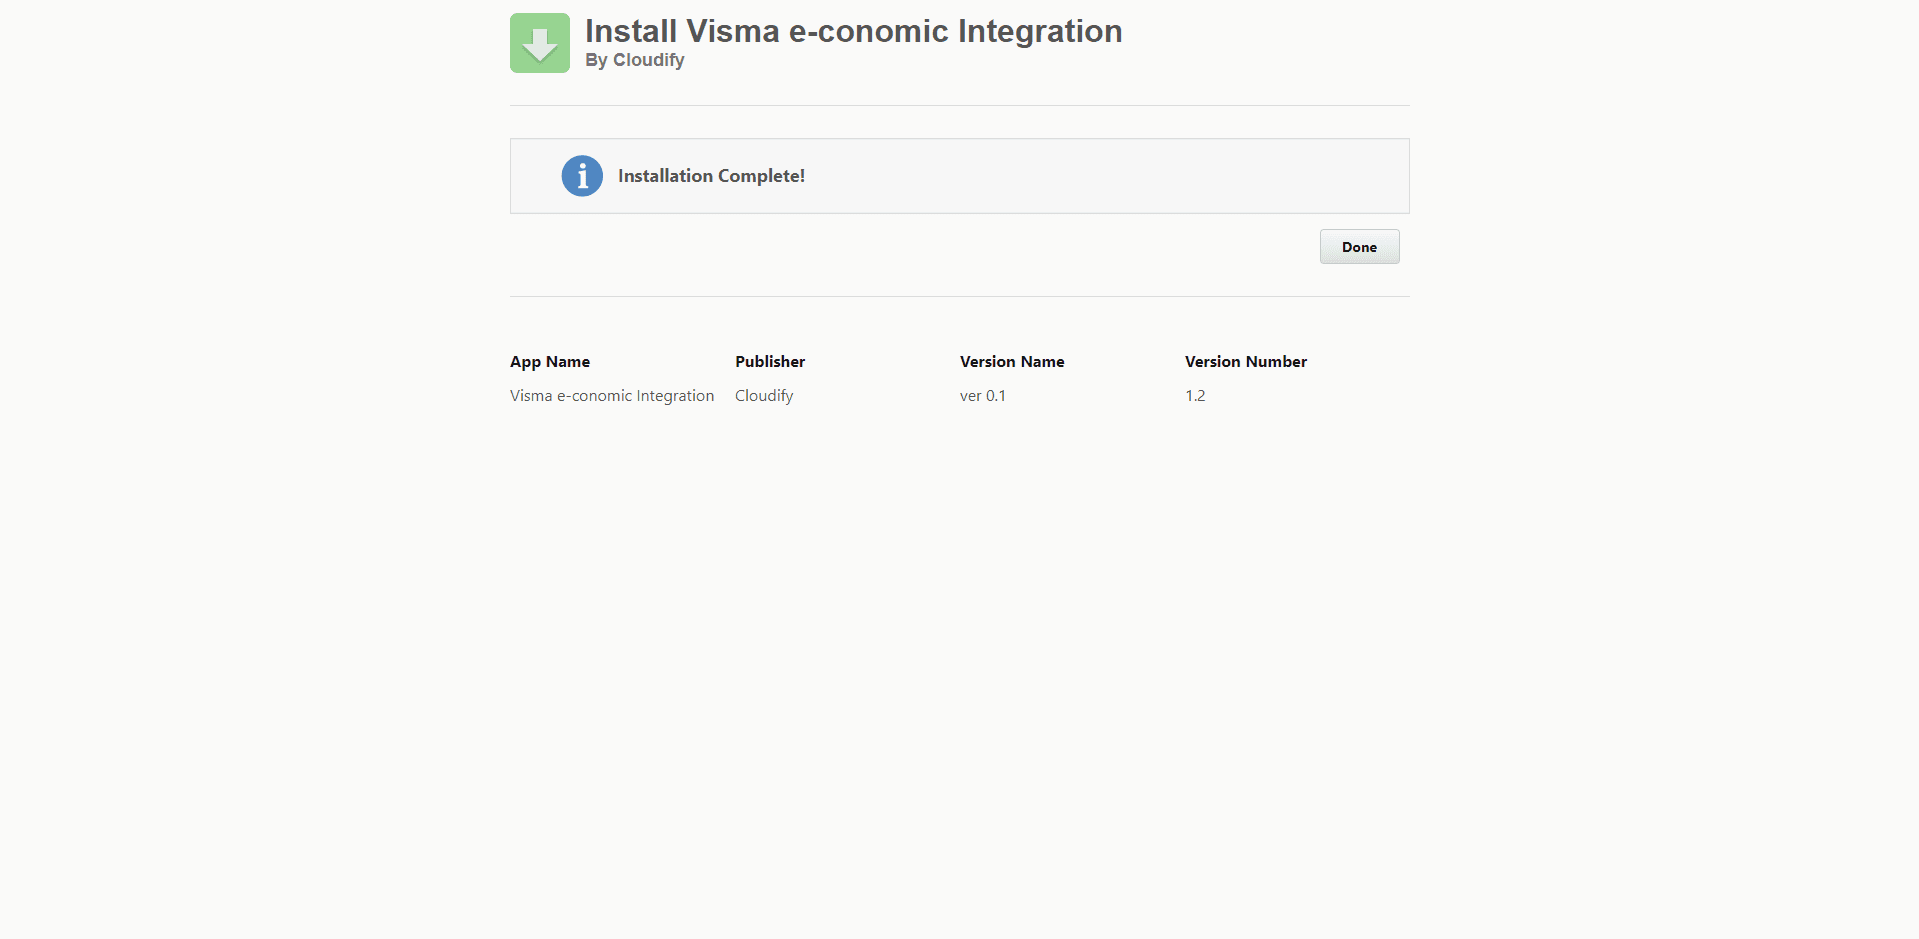
vi) You will receive the installation complete message. Click "Done".
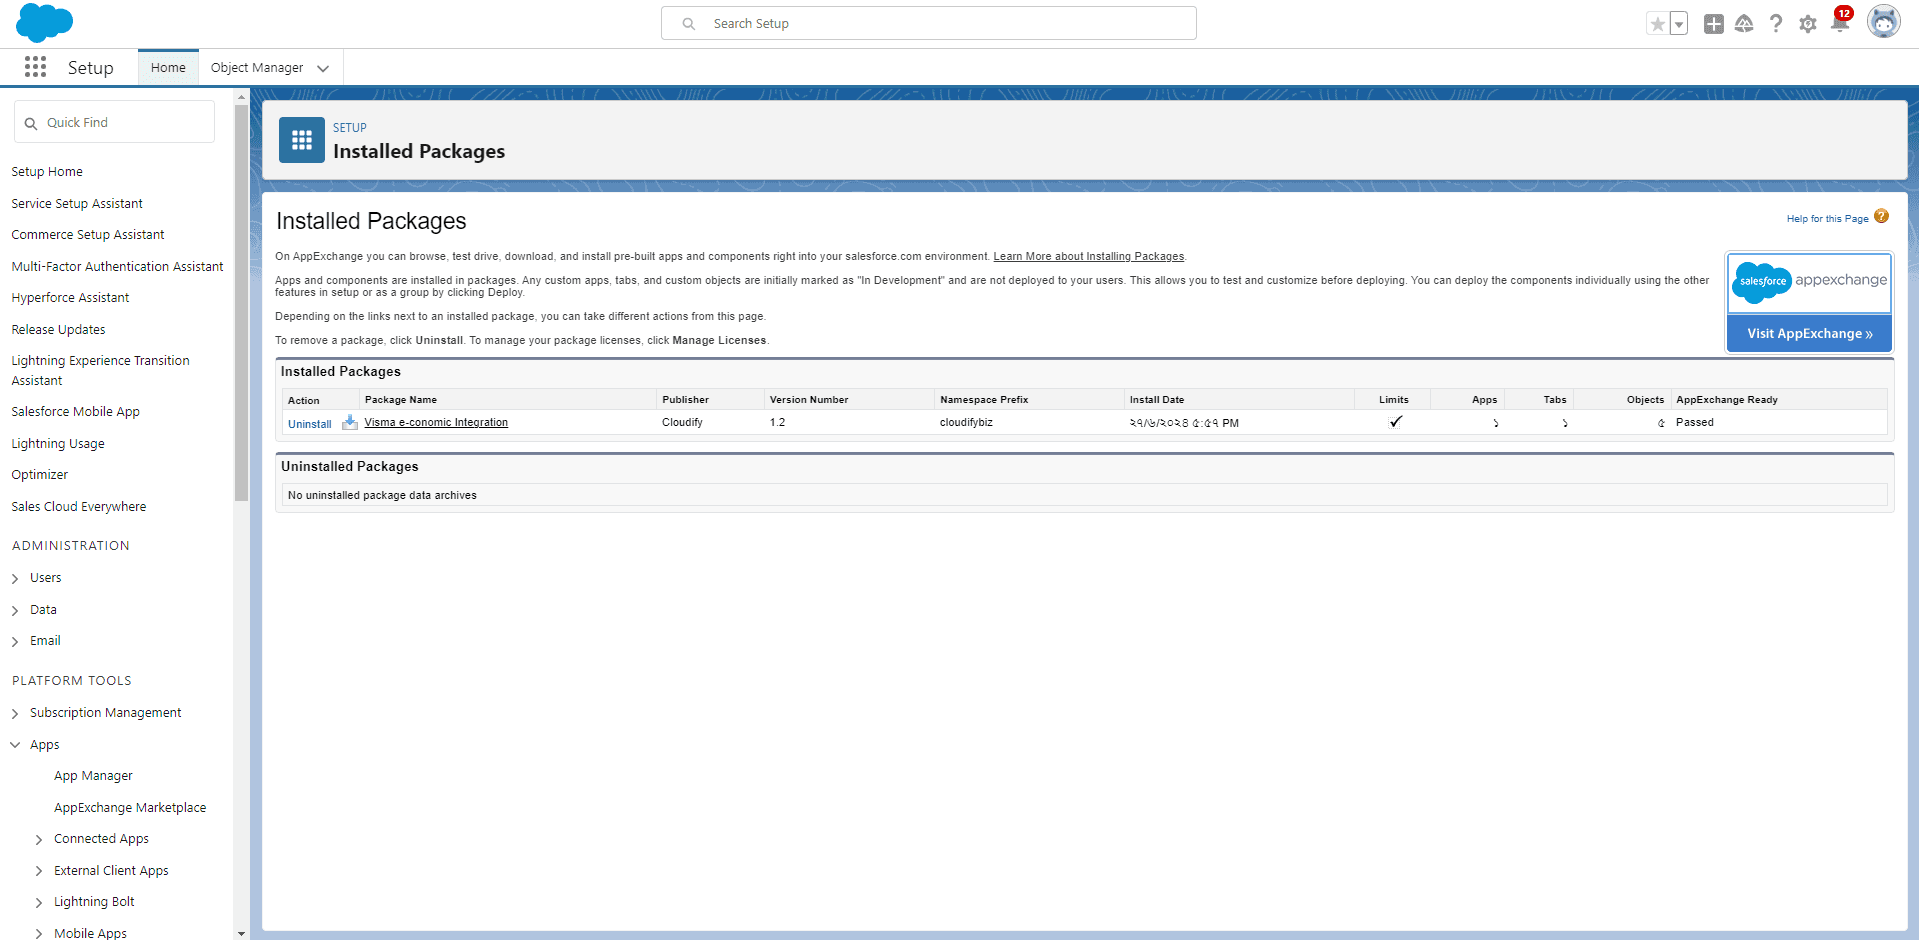
vii) You will be redirected to the page where Visma e-conomic has been installed.
Got unique integration needs?
Our custom team can build tailored integrations, specialized data mappings, and workflow automations to perfectly match your specific business processes.