Advanced Settings
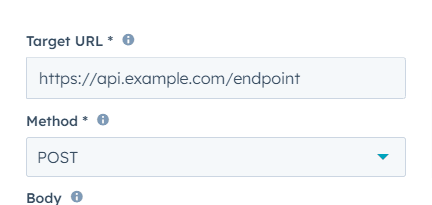
Body Configuration (Only for POST, PUT, PATCH)
Click on the "Body" field
Insert HubSpot properties using {{property.name}} syntax
Structure data in JSON format
Example:
{
  "customerName": "{{contact.firstname}} {{contact.lastname}}",
  "email": "{{contact.email}}",
  "lastPurchaseAmount": "{{deal.amount}}",
  "lastPurchaseDate": "{{deal.closedate}}"
}
{
"customerName": "{{contact.firstname}} {{contact.lastname}}",
"email": "{{contact.email}}",
"lastPurchaseAmount": "{{deal.amount}}",
"lastPurchaseDate": "{{deal.closedate}}"
}{
"customerName": "{{contact.firstname}} {{contact.lastname}}",
"email": "{{contact.email}}",
"lastPurchaseAmount": "{{deal.amount}}",
"lastPurchaseDate": "{{deal.closedate}}"
}Query Parameters (For GET, DELETE, POST, PUT and PATCH)
Click and Add key-value pairs
Use HubSpot properties or static values
'&' separated key-value pairs
Example:
Custom Headers
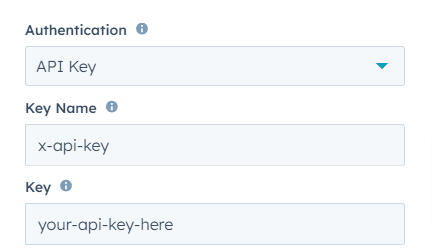
Add any required custom headers
Useful for API versioning or additional authentication methods
Comma separated key-value pairs
Example:
X-API-Version=v2, x-custom-header=value

Escape values to be valid json
To escape a value, use 'escape' function like this:
{
"name": "escape({{ enrolled_object.dealname }})"
}
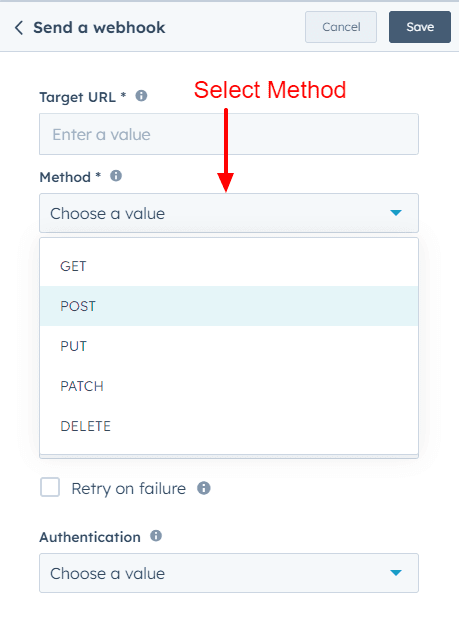
Save you configuration
Once finished with configuring the webhook remember to save

And your webhook it now ready to run whenever triggered